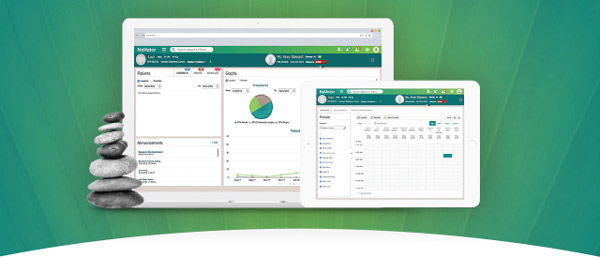
Latest updates include enhancements to the Patient Record, SOAP Notes, Treatment Sheets, and more!
Patient Dashboard
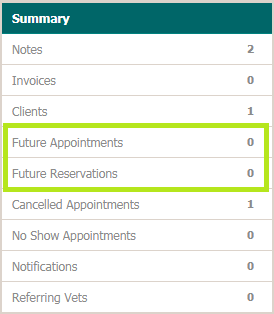
You can now schedule a future appointment or boarding reservation directly from the dashboard screen!
To schedule an appointment, click on the Future Appointments link and choose Add Appointment.
To schedule a boarding reservation, click on the Future Reservations link and choose Add Reservation.
Attach Multiple Files to Patient Records
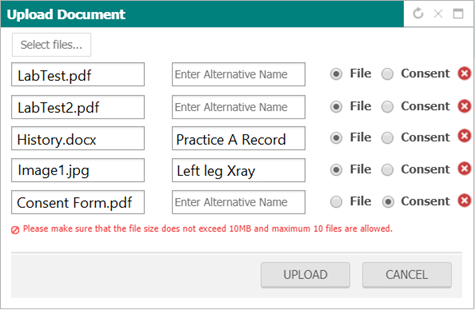
When attaching files to a patient’s record, you can now choose more than one file at a time. From the Encounter screen, choose Upload. A prompt will appear, letting you know you can choose multiple files, up to 10 at one time. (Please note that each attachment cannot exceed 10MB.)
After you’ve browsed and selected all of your files, another screen will come up, listing the names of the files you’ve uploaded and giving you an opportunity to enter an alternative name for each document. As you can see below, you’ll also have the ability to choose whether each document is a “file,” a “consent,” or to disregard an upload using the red X.
Add Lab Tests to Health Service Plans
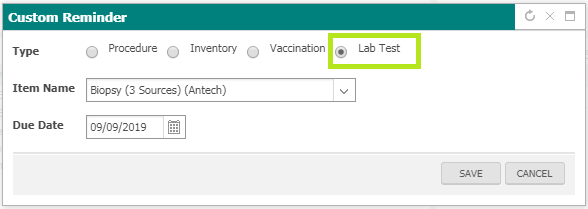
You can now add Lab Tests to new or existing Health Service Plans. To add, navigate to Settings > EMR >> Health Service Plan. Either create a new plan, or edit an existing one in the list. When you click Add, you’ll now have Lab Test as an option in the drop-down menu.
You also now have the ability to add a Lab Test from the custom reminder area on the patient dashboard.
Overall Discount on an Invoice
Currently, adjustments and client discounts can be applied to individual items on the invoice. Now, you’ll be able to apply an overall percentage discount to the entire invoice. When updating client invoices, you’ll notice a new field that allows you to enter a discount of up to 100% of the invoice total. The discount will be calculated on all items.
Please Note: If the user changes the original amount to be charged for an item, the discount will not apply to that item.
To activate the ability for a user to apply overall invoice discounts, navigate to Settings > Admin >> User Group. Select appropriate User Group and expand Billing > View Invoice >> View Invoice History >>> Apply Overall Discount.
Productivity By Item Report
This report will give you information tied to any Procedure, Inventory, or Lab Test item in your practice. Available filters can give you information on all item types OR can be drilled down to find specific information on specific items. Once you set the filters and click View, the report will display the selected item(s), invoice date, Client, Patient, Provider, and Quantity. As with all reports in NaVetor, this information can be exported into Excel, Word, or as a PDF.
The security option for this report is available by navigating to Settings > Admin >> User Groups and choosing the appropriate User Group. From there, expand Reporting > Practice Reports >> Productivity by Item.
Refund Options
You will now have the ability to refund an invoice that has had a payment applied to it, either using the original method of payment or changing to an alternate payment type. If you wish to change the method of payment, you will need to choose External and use cash or check.
Letterhead Printing Options
If your practice would like to use its own letterhead when printing invoices or payment receipts, you now have that as an option!
At the bottom of the invoice, a new option, Letter Head Print, will display. This new option will also appear when printing a payment receipt.
Single Save Option on the Fee Schedule
Currently in the fee schedule, you have to click Save at the end of every line on a page in order to save your changes. We’ve added a Save All button at the top of this page. If you need to make changes to multiple items, you can now enter the changes and click Save All at the top of the page.
SOAP Notes and Providers
When the appointment is checked in, the provider associated with that appointment is automatically associated with the SOAP information. Now you’ll have the ability to switch providers within the SOAP, if other providers have provided care for the patient. When you make the switch to the other provider, all previously entered items will reflect the original provider. Only the new items added under the “switched to” provider will be affected.
To change a provider associated with a SOAP, click on the drop-down menu in the upper-left-hand corner of the SOAP. You’ll see all active providers that have been entered into NaVetor listed as options. Select the new provider, and Save. From that point forward, all new items added to the plan will be associated with the new provider.
Treatment Sheet Updates
On the Treatment Sheet, you can now easily add additional occurrences of medications, labs, procedures, monitoring, inventory, and vaccines. From the Treatment Sheet where items are already entered, click on the time slot where you wish to add additional quantities of a given item. After clicking on the empty time slot, you’ll see the following screen:
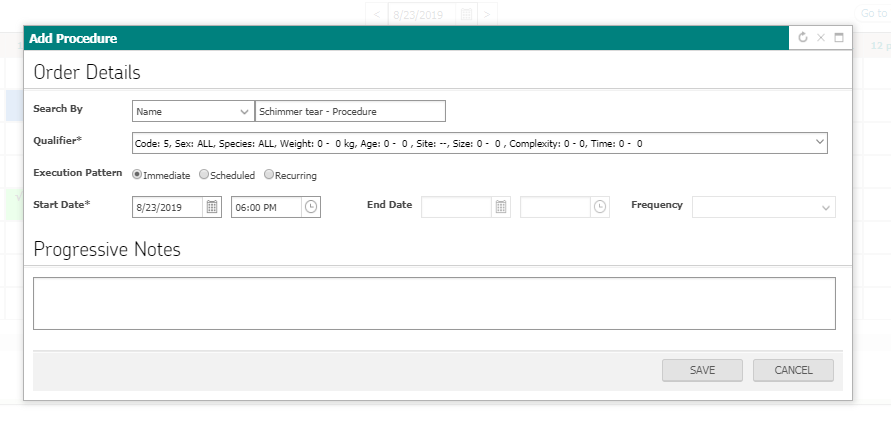
The dialog box will have most of the information pre-filled. Just complete the form, Save it, and the additional treatment will be added to the appropriate row.
We hope these new enhancements to our cloud-based practice management software make your day and your veterinary practice workflow run more smoothly! If needed, our support team is here to help. Contact us if you have any questions, at (833) NaVetor or support@navetor.com. Watch your email inbox (and this blog site) for more updates in the future.

