Email medical records, personalized client messages, appointment confirmations, and more!
We’re always working to enhance and improve NaVetor veterinary cloud software based on feedback from our users. Here are the newest features you’ll find in NaVetor!
Email Medical Records
On the Patient Dashboard, there is now an option on the right-hand side of the screen to Print/Email Medical Records.

When the button is selected, a pop-up will appear, where you can select the date range of the medical information you wish to send, and then select the actual items to be included in the report. If you click on Email, the following screen will appear:
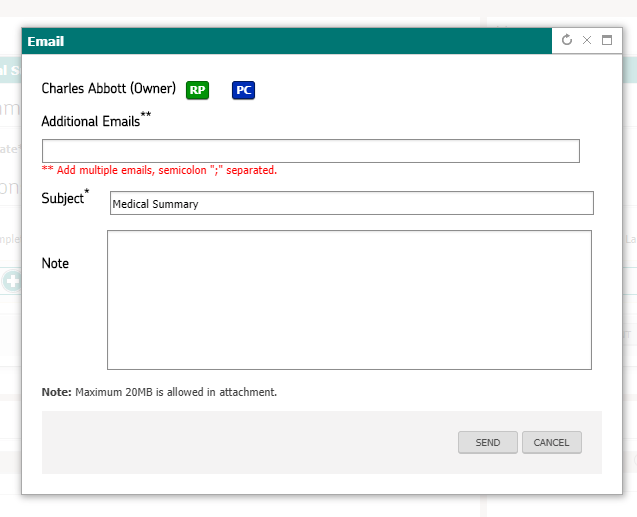
Enter any email addresses you wish to send the information to, and click send. If the client has an email address entered in NaVetor, it will automatically populate in the box. Also, the file size can’t exceed 20MB in order to be emailed. If you choose the Print option, the report will open in another tab for you to review, and then click on Print.
Options for the items to automatically include can be configured in Practice Settings. Settings > Admin > My Practice > Practice Settings.
Send Personalized Client Messages
You now have the ability to send personalized client messages from both the Client Dashboard and the Scheduler. From the Client Dashboard:

On the Client Communications tab, there is now a button to “Send Message.” When you click on that, the following pop-up will appear:
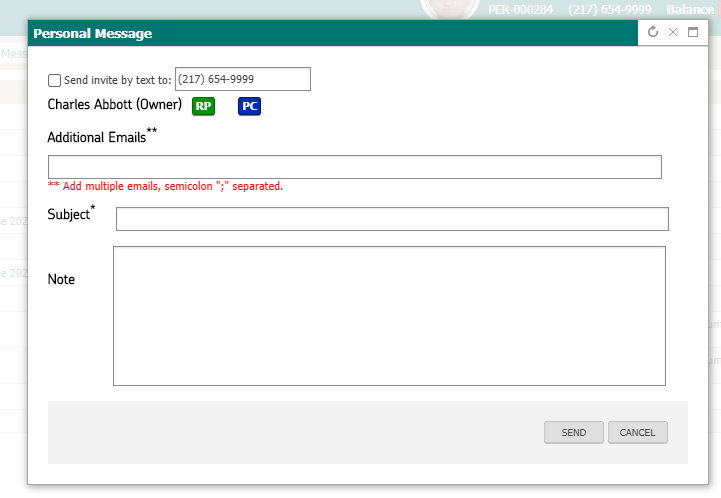
If there is a cell phone number and email entered for the client, it should populate. You can also put in alternate numbers/email addresses. Once you’ve composed your message and click send, the information will write back into the Client Communications record.
From the Scheduler, when you left click on the appointment and bring up the context menu, you’ll have an option to send a message:
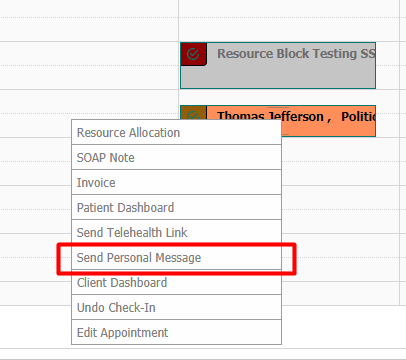
When you select that option, the same pop-up will appear as above. The information will write back into the Client Communications tab on the Client Dashboard.
Appointment Confirmation
Once an appointment has been added to the Scheduler, you will now have the option to mark the appointment as “confirmed.”
When you left-click and open the context menu, you’ll have an option for Confirmed. Once you choose Confirmed, a message will appear letting you know the status of the appointment has been changed.
When you hover over the appointment, the appointment status will show that it has been confirmed:
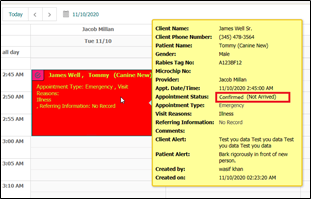
After confirming, the context menu will change to show confirmed instead of scheduled.
This status change will be reflected on the Patient Tracking and Whiteboard as well.
If for some reason you had confirmed the appointment by mistake, you can click on Scheduled and the appointment will no longer show as confirmed.
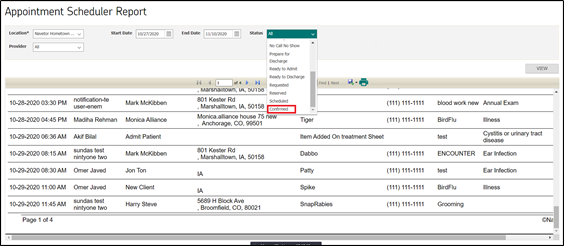
In Reports, the Scheduler Report has been updated to filter out by the status of Confirmed as well.
Custom Client Communications
On the Client Dashboard, in the Communications tab, you will now have an option to “add” a custom communication for the client:
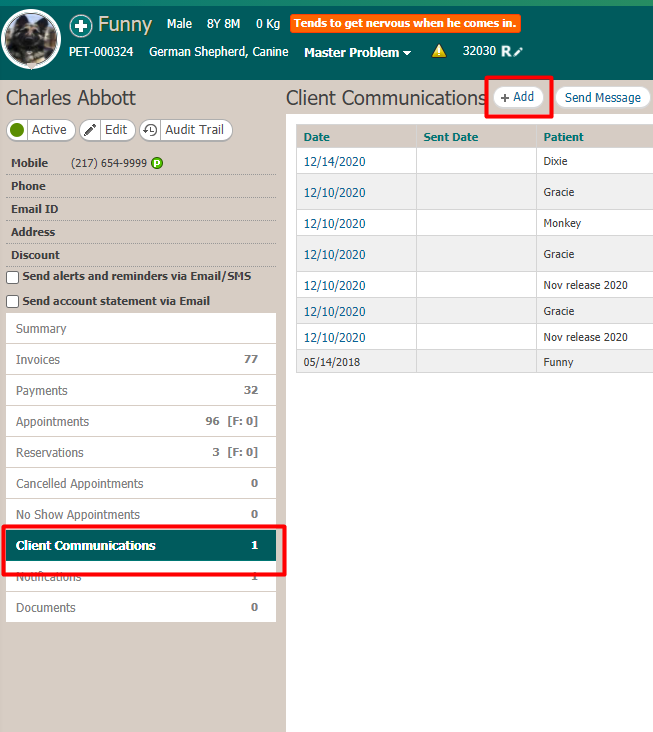
When you click Add, the following pop-up will appear:
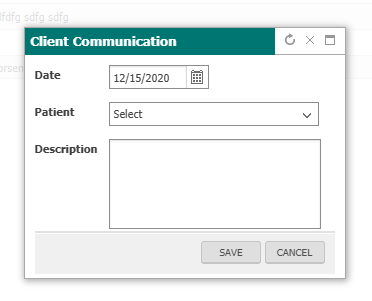
The date will default to today’s date. Select the patient, and then enter the contents of the notes/items that were communicated to the owner. When you click Save, the communication will be added to the list. Once added, there will be a red “X” at the end of the row. This will allow the communication to be deleted.
Create a New SOAP or Invoice from Banner Search
You can now quickly create a SOAP or invoice for a patient through the Search Field in the Banner:

Resource Allocation for Checked-In Patients
When a patient appointment is checked in on the Scheduler, when you left-click and the context menu opens, you’ll now have a choice for Resource Allocation.
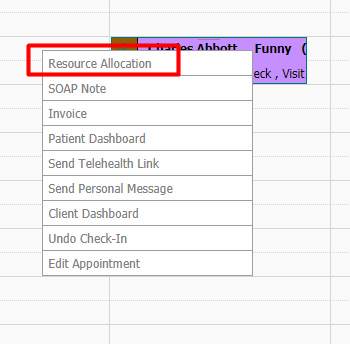
When you click on the option, the following screen will appear:

Pick the category for the type of resource they will be using. For example, when you set up an Exam Room as a Resource, if you used “Rooms” as your category, you will need to pick that before you can pick the resource.
These resource allocations can be changed at any time throughout the visit. When you hover over the appointment now, the resource will be showing in the information displayed. Also, when you are in the Whiteboard > Patient Tracking (Tracking and Client Tracking tabs), these screens will be updated to reflect what “resource” is being used for the patient.
Rabies Vaccination Report
In addition to the Rabies Tag Report, we have now added a Rabies Vaccination Report with greater detail. To access the report, select Reporting > Practice Reports > Rabies Vaccination Report.
Dosage Instructions for Invoice Line Items
If you have dosage instructions set for procedures, inventory and labs, this information will automatically pull in when the items are added on a SOAP, Invoice or Treatment Sheet.
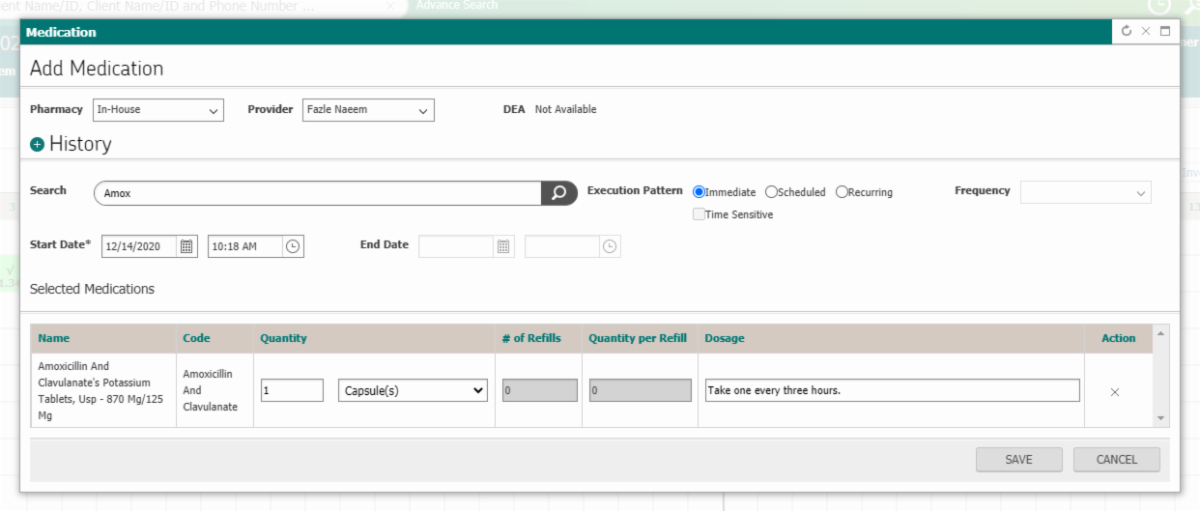
If you need to adjust the instructions, from the invoice click on the Comments icon:
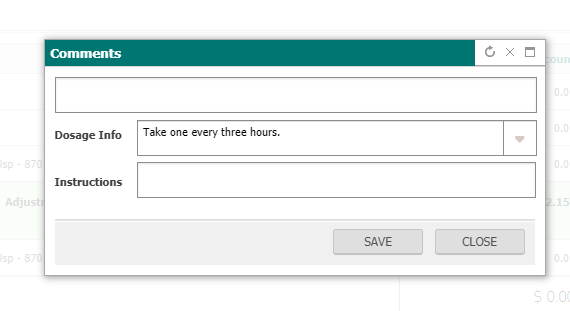
The dosage instructions can be viewed and/or changed at this point. If there are refills associated with the medication, and you make changes to the instructions, the next time you add the item as a refill, your last-modified instruction will pull in.
As a friendly reminder, our support team is here to help. We are easily reached through the Live Chat tool within NaVetor, by email at support@navetor.com, or by phone at 833-628-3867.

