New this month – timeclock, timeclock reporting, auto-checkout, patient appointments, recall reminders, and more!
Timeclock
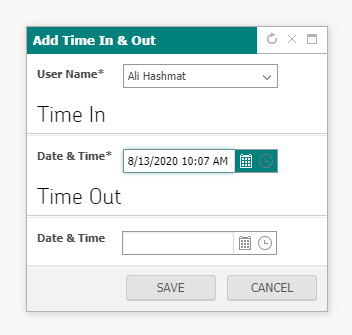
A Timeclock feature has been added to NaVetor. In the banner, an icon with a clock allows you to clock in or out during your shift. Security functions have been added so you can only allow certain staff the ability to approve or edit times.

When you click on the clock, the following screen will appear. You can also access the feature by going through Settings > Admin > Time Clock.

An admin user will be able to edit or delete the entry. If you try to approve before the Time Out entry has been entered, a message to “Please enter Time Out before approving the record” will appear. Once the entry has been approved, the only option you will have in the Actions menu is to delete the record.
Timeclock Report
A Time Clock Report is available now to show totals for ALL employees or individual employees’ punch in/out times. The report can be accessed through Reporting > Practice Reports > Time Clock Report. You can filter the report by one staff member, or more than one, so you can get cumulative totals of all times for the specified period.
The report will show Time In, Time Out, Duration for a Specific Day, and Total Duration for staff members.
Auto-Checkout Patients from Scheduler
If a patient or patient(s) are still checked in from prior appointments when you attempt to check them in on a new appointment, you will be prompted to check them out from the previous appointment.
The patient(s) can be checked in from the following screens: Scheduler, Dashboard, Patient Banner, and Walk-in/ER appointment through the patient dashboard.
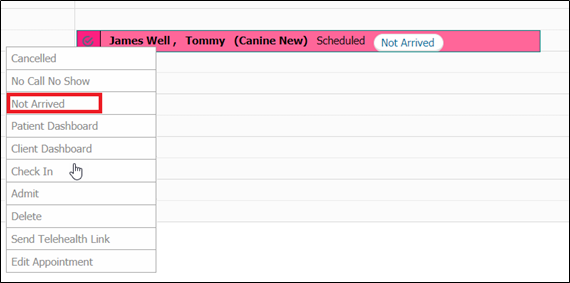
In addition, the “Arrived/Not Arrived” status can also be changed from the context menu on the appointment. This information will also be updated in the tool tip when you hover on the appointment.

Search for Patient Appointments
In the Scheduler and Boarding Calendar, you can now search for future as well as all prior appointments for a patient. With the filter, you can search for the patient name, patient ID, client name or client ID. Select whether you want ALL appointments to show, or just FUTURE appointments.
When you type in the name, you will be able to choose the correct client/patient.
Once you select the correct client/patient, the appointments will filter based on your selection of ALL or FUTURE:

Then click on the appointment, and you will go to that calendar date the appointment was on.
NOTE: In some cases, you may notice an appointment in the list is showing with a RED background. If you click on that appointment, it will close the search screen. That indicates the appointment was for a provider that was made inactive. You can’t return to those appointments since the provider is no longer active.
Add Recall Reminders from Recall Worklist and Patient Dashboard
To add a new Recall Reminder from the Recall Worklist, we’ve added a button on the Worklist screen:

Locate the patient and fill in all pertinent information about the recall. Then click Save.The recall should now be displayed with others on the Worklist screen.
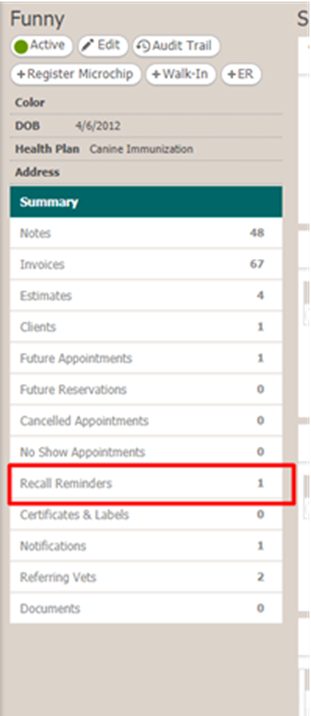
From the Patient Dashboard, an item for Recall Reminders has been added to the menu on the left of the dashboard.

Click on Add Recall Reminder and follow steps to add recall as detailed above. Once you save the recall, it will show in both the Worklist and Patient Dashboard.
As a friendly reminder, our support team is here to help. We can be reached through the Live Chat tool within NaVetor, by email at support@navetor.com or by phone at 833-628-3867.

